

When it comes to the installation of an evaporator, a crucial component in various cooling and refrigeration systems, a comprehensive understanding of the installation requirements is essential for ensuring optimal performance, efficiency, and longevity. As an evaporator supplier, we are well - versed in these requirements and are committed to providing our customers with the necessary guidance to make the installation process as seamless as possible.
1. Site Preparation
The first step in the evaporator installation process is site preparation. The location where the evaporator will be installed must be carefully selected. It should be a well - ventilated area to prevent the build - up of heat and ensure proper air circulation around the unit. Adequate space around the evaporator is required for maintenance access, typically with a clearance of at least 1 - 2 feet on all sides. This allows technicians to easily reach the unit for inspections, cleaning, and repairs.
The floor or surface where the evaporator will rest must be level and strong enough to support the weight of the unit. Uneven surfaces can cause stress on the evaporator structure, leading to potential leaks or mechanical failures. For larger evaporators, a reinforced concrete pad may be necessary. In addition, the installation site should be protected from environmental factors such as excessive moisture, dust, and direct sunlight. Moisture can cause corrosion of the evaporator components, while dust can clog the coils and reduce efficiency. Direct sunlight can increase the temperature of the evaporator and make it work harder to achieve the desired cooling effect.
2. Electrical Requirements
Evaporators are powered electrical devices, and proper electrical installation is of utmost importance. The power supply must match the electrical specifications of the evaporator, which are usually indicated on the unit's nameplate. This includes the voltage, frequency, and amperage requirements. For example, a typical commercial evaporator may require a 220 - 240V, 50Hz power supply.
A dedicated electrical circuit should be installed for the evaporator to avoid overloading existing circuits. The circuit should be protected by appropriate fuses or circuit breakers to prevent electrical fires in case of a short circuit or overload. It is also recommended to install a grounding system to ensure safety. Grounding helps to divert electrical current safely to the ground in the event of a fault in the electrical system.
All electrical connections must be made according to local electrical codes and standards. Loose or improper connections can lead to electrical arcing, which not only poses a safety hazard but can also damage the evaporator's electrical components. If you are unsure about the electrical installation, it is advisable to hire a qualified electrician.
3. Piping and Refrigerant Requirements
The piping system for the evaporator is a critical part of the installation. The piping should be made of high - quality materials that are compatible with the refrigerant used in the system. Commonly used materials include copper and aluminum for their good thermal conductivity and corrosion resistance.
The pipe diameter must be carefully selected to ensure that the refrigerant can flow through the system at the correct rate. Incorrect pipe sizing can lead to reduced cooling capacity, increased energy consumption, and potential damage to the compressor. The piping should be properly installed with adequate insulation to prevent heat gain or loss. Insulation also helps to reduce the formation of condensation on the pipes, which can cause water damage and corrosion.
Before connecting the evaporator to the refrigerant system, the piping must be thoroughly cleaned to remove any dirt, debris, or moisture. Moisture in the refrigerant system can cause ice formation in the evaporator, reducing its efficiency and potentially damaging the compressor. Once the piping is connected, a pressure test should be conducted to check for leaks. Any leaks must be repaired immediately to prevent refrigerant loss, which is not only harmful to the environment but also affects the performance of the system.
4. Evaporator Coil Considerations
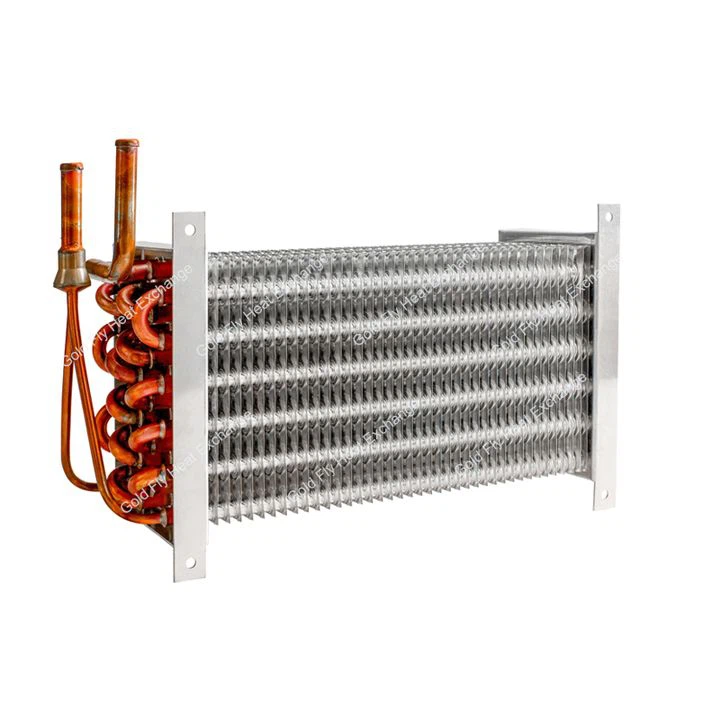
The evaporator coil is a key component of the evaporator. Its performance directly affects the overall efficiency of the cooling system. When considering the evaporator coil, Evaporator Coil Dimensions play an important role. The coil dimensions must be carefully selected based on the cooling capacity requirements of the application. A coil that is too small will not be able to provide sufficient cooling, while a coil that is too large will be inefficient and may lead to high initial costs.
The type of evaporator coil, such as a Chiller Evaporator Coil or a New Evaporator Coil, also needs to be considered according to the specific application. Chiller evaporator coils are commonly used in large - scale commercial and industrial cooling systems, while new evaporator coils may offer improved performance and energy efficiency features.
The coil should be installed in a way that allows for proper air flow across the fins. The fins help to increase the surface area of the coil, enhancing heat transfer. Obstructions to the air flow, such as dirt, debris, or improper installation, can reduce the efficiency of the coil and increase energy consumption. Regular cleaning of the coil is necessary to maintain its performance.
5. Control System Installation
Modern evaporators are often equipped with advanced control systems that regulate the operation of the unit. The control system installation should be integrated with the overall cooling system. It should be able to accurately monitor and control parameters such as temperature, pressure, and refrigerant flow.

The control system should be installed in a location that is easily accessible for programming and maintenance. All sensors and actuators in the control system must be properly calibrated to ensure accurate operation. Incorrect calibration can lead to improper operation of the evaporator, such as over - cooling or under - cooling, which can affect the comfort level and energy efficiency of the space being cooled.
6. Commissioning and Testing
After the installation is complete, a comprehensive commissioning and testing process is required. This involves checking all the electrical connections, piping connections, and control system settings. The evaporator should be run through a series of test cycles to ensure that it is operating within the specified performance parameters.
Temperature and pressure readings should be taken at various points in the system to verify proper operation. The cooling capacity of the evaporator should be measured and compared to the design specifications. Any discrepancies should be investigated and corrected before the system is put into full - time operation.
Conclusion
In conclusion, the installation of an evaporator requires careful consideration of multiple factors, including site preparation, electrical requirements, piping and refrigerant connections, coil selection, control system integration, and commissioning. As an experienced evaporator supplier, we can provide you with high - quality evaporators and comprehensive technical support to ensure that the installation process is carried out smoothly and that the evaporator operates at its best.
If you are in the market for an evaporator or have any questions about the installation requirements, we invite you to contact us for a detailed discussion. Our team of experts is ready to assist you in finding the most suitable evaporator solution for your specific needs and guiding you through the installation process.
References
ASHRAE Handbook - HVAC Systems and Equipment. American Society of Heating, Refrigerating and Air - Conditioning Engineers.
Refrigeration and Air Conditioning Technology. William C. Whitman, William M. Johnson, John A. Tomczyk, and Eugene Silberstein.